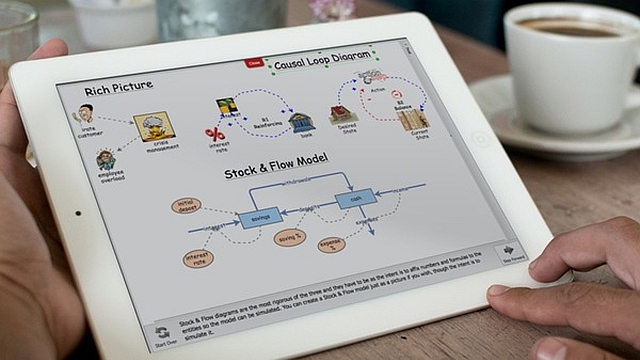
Going Global: Flight Simulators and Serious Games [Systems thinking & modelling series]
This is part 75 of a series of articles featuring the book Beyond Connecting the Dots, Modeling for Meaningful Results.
In the preceding section we described how to rapidly develop a website that contains an interactive model and provides users the ability to comment and discuss the model directly on the page. By leveraging Insight Maker, we embedded an interactive version of our model in our webpage just by copying a few lines of code. By leveraging Disqus, we included a discussion forum with a similar amount of effort.
In many cases, what we created may be exactly what you are looking for. In other cases you may wish to provide your users with a unique experience tailored to understanding a specific problem. For instance, maybe you would like to develop what is known as a “flight simulator”, a simulation tool that puts the user in the position of trying to manage a problem or achieve an outcome. For example, if you had a model of a business going through a disruptive change, you could place the user in the position of the company’s leader and provide instructions to adjust parameters in the model in order to safely shepherd the company through this challenge.
Similarly, “serious games” are tools designed to both engage and educate about a system. You can create a simulation model at the heart of a serious game or a flight simulator. You could give users direct access to this simulation model’s interface, but generally you want to display a control panel type interface to the user. You do this by building a customer interface on top of the model to hide the stock and flow diagram.
Fortunately, web technologies provide a rich environment for developing these flight simulators and serious games. Furthermore, using Insight Maker you can build your model and simulation engine using its model building tools and then build a custom interface on top of the model to provide the exact experience you want the user to have. In the following sections we will develop a custom interface to control our world population simulation.
Setting up the Page
We’ll start by stripping down our page from the previous example. Let’s remove the commenting system and the introduction so the page just contains the model (later on you can add these other items back as an exercise). After we do this, we will be left with a page that just contains the embedded world simulation model.
In this case, however, we do not want the user to actually interact with or even see the embedded model. We will add our own custom interface and just use the embedded model to run simulation in the background. To hide the embedded model we can add a CSS rule that makes the <iframe> tag invisible:
display: none;
}
This rule turns off the display of all <iframe> tags in the page. They are still there and in the page, but they are not shown to the user. The resulting completed template for our page is shown below. When you open this in your browser you should see a completely blank webpage.
<head>
<title>A Fragile Future</title>
<style>
iframe {
display: none;
}
</style>
</head>
<body>
<IFRAME SRC=“http://InsightMaker.com/insight/1954/embed?topBar=1&sideBar=1&zoom=1″
TITLE=“Embedded Insight” width=600 height=420></IFRAME>
</body>
</html>
Creating the Control Panel
You can create form elements for users to input data by using the HTML tag “<input>”. The <input> tag has an attribute called “type” that determines the type of the input element. There are many types, including “number”, “text”, “color”, “textarea”, “date”, and “button”. We’ll design our control panel to modify two parameters of the model, and to provide a button that users can press to run the simulation. In addition to specifying the type of the inputs, we should also specify their initial values in the control panel. We can do that using the “value” attribute of the <input> tag.
Finally, we will need some method to reference the inputs and to later load their values. Each tag in an HTML document has an optional “id” attribute. This attribute can be used to obtain a reference to that element from JavaScript. We’ll set the id attribute for our two input fields so we can obtain their values when we are ready to run the simulation.
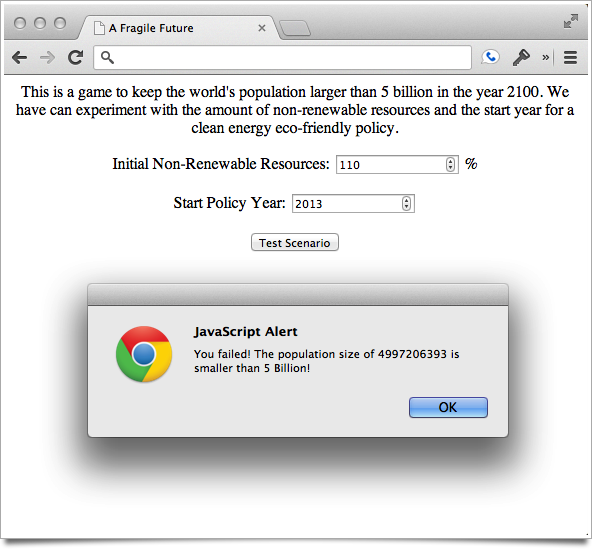
The resulting control panel will look something like the following code. As you can see, we have presented the user with a simple task – to find a combination of settings that results in over 5 billion people in the year 2100 (which is in fact a significant decrease from the current population size so it should not be too hard). You should place this code after the <iframe> tag in your document.
<p>This is a game to keep the world’s population larger than 5 billion in the year 2100.
We can experiment with the amount of non-renewable resources in the world and the
start year for a clean energy eco-friendly policy.</p>
<p> Initial Non-Renewable Resources: <input type=“number” value=“100”
id=“resources” /> % </p>
<p> Start Policy Year: <input type=“number” value=“2013” id=“year” /> </p>
<p> <input type=“button” value=“Test Scenario” /> </p>
</center>
This will create two input fields into which users can input numeric values. The first, Initial Non-Renewable Resources will allow the user to increase or decrease the amount of non-renewable resources assumed in the model at the start of the simulation. The second, Start Policy Year allows the user to specify the start date to implement a clean technology policy, which will reduce the amount of pollutants being generated in the simulation. A button is also created that lets the user test the scenario in the simulation.
Making it Interactive
We use JavaScript to add interactivity to the webpage. Let’s define a JavaScript function testScenario that we will use to read in the user-specified options from the control panel, run the simulation with these parameter values, and finally report to the user whether or not they were successful in keeping the population size above 5 billion.
We will fill out the testScenario function with steps later; for now, just add the following code to the head section of your webpage.
function testScenario(){
alert(“Scenario tested!”);
}
</script>
This creates the function, but we also need a way for the function to be executed when the “Test Scenario” button is pressed. There are several ways to do this. The easiest is to set the “onClick” attribute of the button to call the function. The “onClick” attribute of an input may contain JavaScript code that is executed when the button is clicked. To link up our button with the testScenario function, we change our input button in the HTML to:
Implement the webpage up to this point and check to make sure that you see a message pop up saying “Scenario tested!” when you press the “Test Scenario” button.
Now that we have implemented basic interactivity, let’s flesh out the testScenario function.
Load Parameter Values from the Control Panel
We use the document.getElementById function to access an input field from JavaScript. This function is built into your browser and allows you to obtain a reference to one of the input elements based on its “id” attribute. Once we have a reference to the input element we can use the element’s “value” property to obtain the number the user has entered into the input field.
The following code defines two variables in JavaScript with the same values as the ones the user has entered. Enter this code at the top of your testScenario function.
var year = document.getElementById(“year”).value;
Inject the Parameter Values into the Model
Insight Maker has an extensive JavaScript API that can be used to modify and script models.1 This is the same API that may be used with Button primitives. Refer to the Insight Maker API reference.
The API instructions provide examples about how to integrate and modify an embedded model. We will adapt those instructions to our own case. First, as the instructions indicate, we need to update our <iframe> tag to add an “id” attribute. We adjust our <iframe> tag like so:
TITLE=“Embedded Insight” width=600 height=420></IFRAME>
Now we can obtain a reference to the model using the document.getElementById function from before and then we can send API commands to it using its postMessage function. Within Insight Maker, we use the findName API command to get a reference to a specific primitive and then use the setValue API command to set the value of that primitive to the value of the parameter in the control panel. Add the following code to the testScenario function.
model.postMessage(“setValue(findName(‘Progressive Policy Adoption’), ‘”+year+“‘)”, “*”);
This convoluted postMessage mechanism to pass JavaScript commands to the embedded model is a constraint necessitated by your browser’s security mechanisms. It makes the processing of interacting with embedded models more complex than we would like, but fortunately it is still possible to do everything we need to do even using it.
Run Simulation and Access Results
To run the model, we use the runModel Insight Maker API command. We indicate that the simulation should be run in “silent” mode so the results are returned.2 We then use the lastValue function to obtain the final population size for the simulation in the year 2100. Copy this into your webpage at the end of the testScenario function:
So far we have just demonstrated one-way communication between the control panel and the embedded model. This is the first point in time when we need to be able to communicate the other way: to receive data back from the embedded model.
Unfortunately, due to the security constraints imposed by your browser, this is slightly complex. To receive a message back from the embedded model, we need to register an event handler with your main browser window. Don’t worry if you don’t fully understand this, just copy the code below into the script tag of your window.
{
if(event.data){
var pop = Math.round(event.data);
if(pop > 5000000000){
alert(“You won! The population size of “+pop+” is larger than 5 Billion!”);
}else{
alert(“You failed! The population size of “+pop+” is smaller than 5 Billion!”);
alert(“Please try again.”);
}
}
}
Final Result
The code for the completed webpage is provided below and a working version of the page may viewed at A Fragile Future.
<head>
<title>A Fragile Future</title>
<style>
iframe {
display: none;
}
</style>
<script>
function testScenario(){
var resources = document.getElementById(“resources”).value;
var year = document.getElementById(“year”).value;
‘”+(resources/100)*1000000000000+”‘)”, “*”);
model.postMessage(“setValue(findName(‘Progressive Policy Adoption’),
‘”+year+”‘)”, “*”);
}
{
if(event.data){
var pop = Math.round(event.data);
if(pop > 5000000000){
alert(“You won! The population size of “+pop+” is larger than 5 Billion!”);
}else{
alert(“You failed! The population size of “+pop+” is smaller than
5 Billion!”);
alert(“Please try again.”);
}
}
}
</script>
</head>
<body>
<IFRAME id=“model” SRC=“http://InsightMaker.com/insight/1954?embed=1&
topBar=1&sideBar=1&zoom=1″
TITLE=“Embedded Insight” width=600 height=420></IFRAME>
<p>This is a game to keep the world’s population larger than 5 billion
in the year 2100.
We can experiment with the amount of non-renewable resources in the world and the
start year for a clean energy eco-friendly policy.</p>
<p> Initial Non-Renewable Resources: <input type=“number” value=“100”
id=“resources” /> % </p>
<p> Start Policy Year: <input type=“number” value=“2013” id=“year” /> </p>
<p> <input type=“button” value=“Test Scenario” onclick=“testScenario()” /> </p>
</center>
</html>
The key goal of this section is to enable you to adapt these techniques into your own model. It is not important, or even necessary, for you to completely understand these concepts. Numerous additional changes could be made to this demonstration. You could clean up the control panel and make it look more attractive by adding some CSS rules. You could add additional inputs to control other parts of the model. You could show the user the trajectory of the population instead of just the final value. Go ahead and experiment with this example to see what you can make it do.
| Exercise 11-8 |
|---|
| Use CSS to change the style of the inputs. Make inputs have a yellow background and blue text. |
| Exercise 11-9 |
|---|
| Adjust the result message when the users have failed to reach the target population size. Tell them how far away from the target size they are. |
| Exercise 11-10 |
|---|
| Add another input to allow users to adjust the initial amount of potentially arable land in the model. |
Next edition: Going Global: Additional Tips.
Article sources: Beyond Connecting the Dots, Insight Maker. Reproduced by permission.
Notes:
- An API, or Application Programming Interface, is a set of commands and functions that can be used to interface programmatically with an application. ↩
- There are two primary ways of running Insight Maker models using the runModel API command. One is the regular way where a results diagram will be shown but the results will not automatically be returned in JavaScript. The second way is in silent mode where the results are returned, but results graphs are not shown in the model interface. ↩